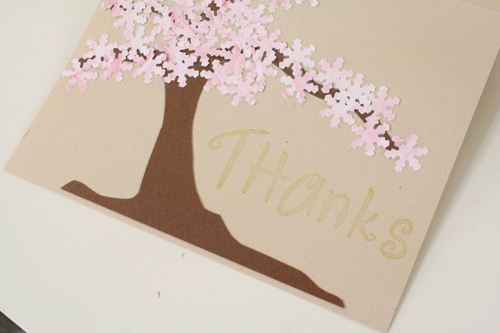
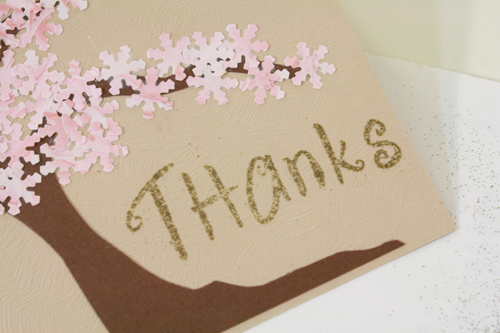
I’ve been trying for ages to craft a decent representation of cherry blossoms, since they’re one of my very favourite things. The felt ones I did way back near the beginning of this blog were alright, but I never really managed to put a decent looking cherry blossom tree on a card. Until now.
Cherry blossoms are what we on the West Coast shovel off our sidewalks in April instead of the snow that the rest of the country is still mucking about in. The city of Victoria even publishes an annual flower count; this is where Victoria counts up all the flowers that are in bloom in the city in early spring, and publishes that number as, so far as I can tell, a giant “F*** you” to the rest of the snow-laden country. And then we all sit back, delighting in our daffodils, tossing our hair about in the light spring breeze and wondering why the folks out east hate us. Victoria has apparently never heard of Wheaton’s Law.
I don’t think the cherry blossoms actually factor in to the flower count, but still. They’re the best flowers of all, as far as I’m concerned, and when I feel like making people in other provinces grind their teeth, my preferred method is to talk about all the beautiful blossoming cherry trees.
So, this card. It’s full of cherry blossoms, which are super pretty, and have magical powers of making you feel like you’re in the best place on earth (even if that’s categorically untrue), and making everyone else hate you. But if you give them a pretty cherry blossom card, maybe they’ll decide to like you again, at least for a little while.
My cards were all made as thank you cards since I just had a birthday and therefor needed to thank people for sending me lovely birthday presents, but this could be a card for a bunch of different occasions – just alter the message on the front. For my cards, I used backgrounds in the cream, ivory, or light brown ranges. Soft yellow might look nice too, green could be good, soft blue would be very bright-spring-skies-like, and probably super appropriate for a Congratulations on Your New Baby card. It’s really up to your tastes and card-giving needs. A black background could show the delicate beauty of new growth against the harsh, bleak Reality of Life, should you need to wish any existential, emo (or just 13-year old) pals a Happy Birthday. Red could indicate your prediction that the Zombie Apocalypse will occur this spring. You could probably stick a pair of hipster glasses on the tree trunk if you wanted to. Truly, this is a very versatile card design.
——————————————
What you’ll need
materials:
- blank cards OR cardstock you can cut and fold into a card shape/size
- envelope – no card is really complete without one
- brown paper
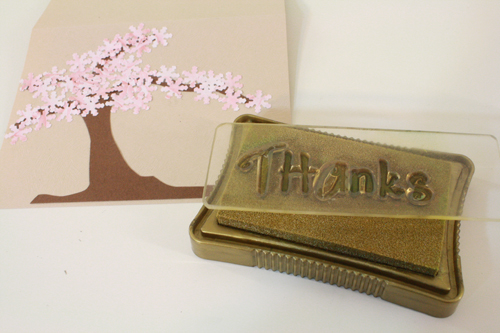
- pink paper or pink-ish/white-ish patterned paper (a nice scrapbooking paper with a pink rose or other floral theme works well)
- stamp OR a nice marker with which to write “Thank You” or “Happy Spring” or “Your Message Here”
Optional:
- embossing powder
- embossing stamp pad (doesn’t dry as fast as a normal stamp pad, and the ink is slightly sticky, at least if you’re embossing powder)
- piece of scrap paper
- stove (gas or electric) – Seriously, you DO NOT need a special, fancy, probably overpriced heat gun to emboss stuff. Though if you have one anyway, it seems like it’d be a fun thing to use.
- paper scissors
- small flower (or snowflake, or something similar) punch
- white glue (also a gluestick, which is optional but helpful)
——————————————
Putting it all together
1) Get out your blank card, or cut and fold one from plain cardstock. See my rambling comments in the introduction regarding colour choice.
2) Draw a tree. Ok, I’ll try to be a little more helpful than that. I’ve demonstrated my tree-drawing method below on white paper so you can actually see it. First of all, draw it backwards from how you want it to look on the card. (And make sure it’s not too tall or wide to fit on the card.) I start with the straight side edge of the paper being the tree’s roots. Then draw a nice trunk that scoops slightly to the right (it’ll scoop to the left once it’s cut out, flipped over and glued put to the card). Then I draw a bunch of branches, usually about five or six in total – two going out sideways-ish on either side of the tree (with the branches on the left being longer), and one or two going in a generally upwards direction in the middle of the tree. I start by just drawing a few general lines, and then making them into branches.
Like this (ish):
And they really don’t need to be perfect – this tree branches are really just lines for you to follow when gluing down your flowers, and in the end they won’t actually show that much.
3) Cut out the tree.
4) Flip the tree over, so the pencil lines are on the back, and glue it to the front of the card.
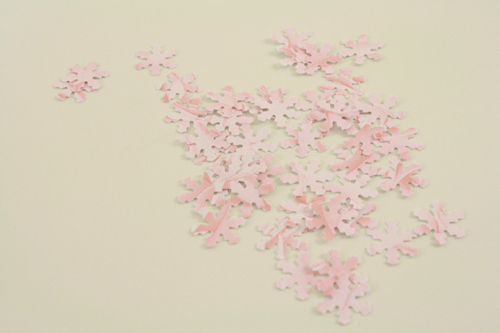
5) Use your flower punch to punch out a whole bunch of flowers from your pink (ish) paper. I didn’t actually ever count, but I probably used about 40 or 50 flowers for each card (the cards being roughly 4 x 5 inches).
I don’t often go in for crafts that use specially shaped punches like this, but there really is no better way to do this. Cutting shapes like this out by hand would be, while not necessarily impossible, certainly a major pain in the nether parts and absolutely not worth it for such a project. The punch I used is actually a little snowflake punch, but the shape works perfectly well as little flowers, too. Punches like this are easy to find at craft stores, and if you go to Michael’s you can use their 40% off any item in the store coupon to get it cheaper (these punches often seem a bit overpriced). It’s a fairly small sort of punch, so not so bad to have to store, and I’ve found this shape pretty generally useful and versatile. (While we’re at it, I also find it super useful to keep a couple small circle punches around, in the 1/2 inch to 2 inch range. Apart from that, I don’t have many of these special shapes punches because relative to what they do they’re large and awkward to keep around.)
6) Once you have a pile of flowers ready, put a little dot of glue at the very end of one the tree branches. Then another dot about 1/4 to 1/2 inch away, on one side of the branch, and another dot 1/4 to 1/2 inch away from that, on the other side of the branch and so on.

7) Stick flowers on top of all the glue dots. Do one or two branches at a time, until the whole tree is covered.
8) Add more glue dots and flowers to any little spots that seem too bare. I usually stick a few extra flowers in the middle area of the tree, to make it look especially full.

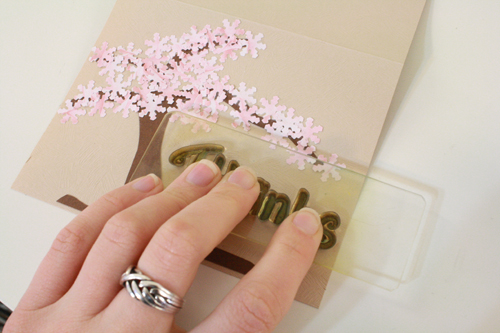
9) Now write or stamp your message onto the card beside the tree.
If you want to add an embossed message… first of all, wait until the glue under the flowers is totally dry. Make sure you have an embossing stamp pad and embossing powder. Then follow the steps below.
10) Turn your stove on to high or medium high. I’ve done this with a gas stove and with an electric stove – works fine either way. Which I imagine means it would work with a hot plate, too. Just make sure you don’t leave the stove on afterwards, and that anyone else in the house knows that the stove burner is on and to be careful.
11) Using an embossing stamp pad (the ink doesn’t dry as fast, and I think it’s a little sticky or something so the powder doesn’t just fall right off), stamp your word or image or whatever onto the card.
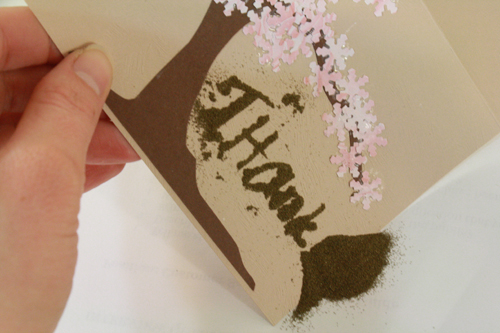
12) Right away, with a piece of scrap paper underneath the card, dump embossing powder over the stamped image or letters, so the powder completely covers the stamp.
13) Gently tip the card and spill all the excess embossing powder onto the scrap paper. You should be left with embossing powder overtop of the area where the stamped word/image is, and nowhere else.
(The powder should actually be clinging a bit more thickly to the letters than in the image above – since I was busy taking pictures of each step of the process, the stamp ink dried too much. I actually went back, re-stamped the image in the exact same spot on this card, and did the embossing powder bit again. That’s the thing – until it’s been melted, you can just brush the embossing powder right off if you need to.)
14) Tip the leftover embossing powder back into the jar. Embossing powder costs something like $5 or $6 at the local Michaels craft store, but this little jar of the stuff has lasted me for ages and many many cards already. So make sure you get a colour you like and plan to use often. Also, I see no reason why the colour of your embossing stamp pad actually needs to match the colour of your embossing powder. In the end, only the powder will be visible anyway.
15) Hold the card over the hot stove. Not to close, of course, or the paper will burn! Several inches above the stove is where you want to be. Hold it steady over the heat (I hold mine face up so I can see what’s happening – it still works fine that way), and after about 20 to 40 seconds the powder will melt very rapidly, leaving a shiny, embossed surface. This melting usually starts in one area and spreads rapidly across the rest of the powdered word or image, a bit like a wave. It’s very neat to watch. As soon as all the powder has melted and transformed, remove the card from the heat.
Note: Embossing often makes the embossed surface a bit unlevel, so you may want to stick the finished card under a heavy book for a little while to flatten it back out.
16) Turn off the stove.
17) Write lovely messages inside your cards and mail them!


