Between blogging about crafts and keeping up an Etsy store, I take a lot of photographs, and I want those photographs to look nice. Getting decent light is the biggest struggle, and I’ve added all kinds of extra lights to my windowless craft room to help with this.
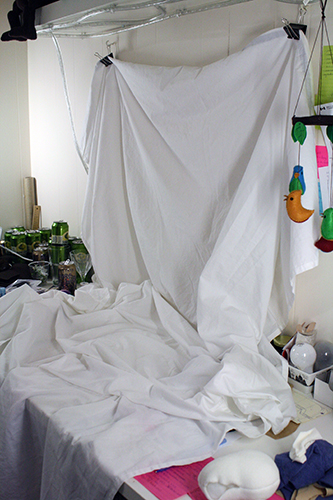
The second biggest struggle is background. I don’t want a bunch of clutter in the background, but unfortunately my workspace (which is where all those nice lights are set up) is almost always cluttered. It’s a major pain to clear it off in order to take photos, and I need to do this several times a week. And no, it’s not possible to keep my workspace uncluttered. Believe me, I’ve tried. It’s like asking gravity to please turn off for a little while each day, thanks.
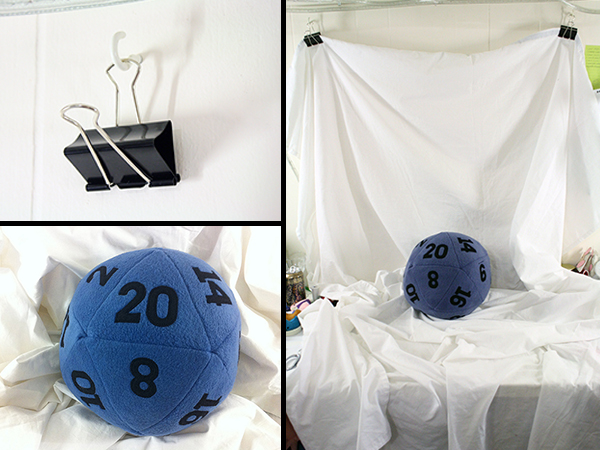
So what’s my solution? Like the mature, capable adult that I am, I cover the clutter up. Throw a sheet over the mess, stick my pretty crafted stuff in front of the sheet and voila – a tidy white backdrop for my photographs.
For a while I tried to tape the sheet to the wall or pile it on top of itself to get the backdrop to continue up the wall behind whatever I was photographing. It usually fell down. Then, I got smart. It happens on occasion.
The supplies I used were:
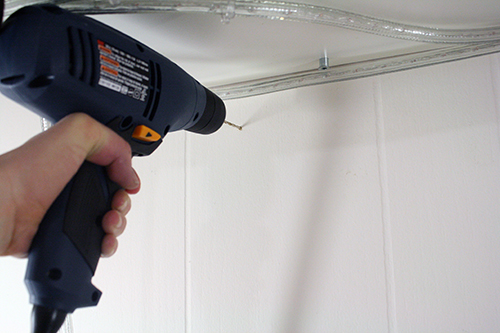
- drill
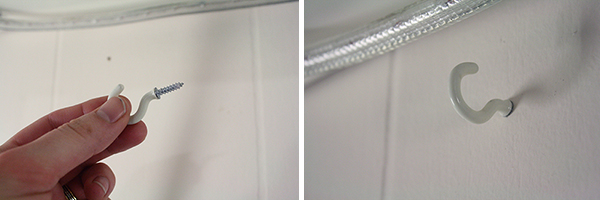
- two hooks with screw ends, medium sized
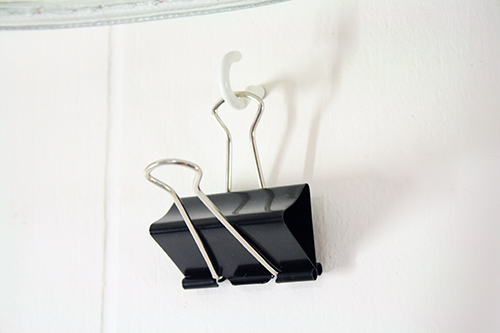
- two giant binder clips (or “bull clips” as I’ve also heard them called)
- sheet
- ruler & pencil
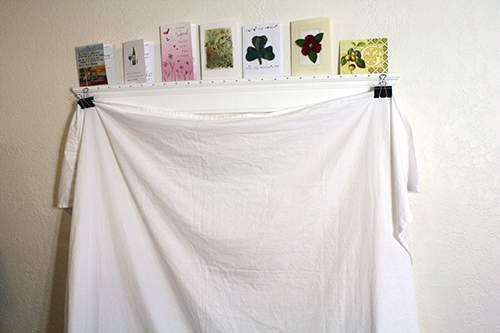
and used the binder clips to hang the sheet. Voila! Quick and easy photo background, and you can easily change its colour by hanging up a different coloured sheet or piece of fabric. Now the only question is why I didn’t think to do this ages ago.
See? You can see the clutter all over my desk, but where the sheet hangs, it suddenly vanishes! Look, tidy, clean white space!
And if I need a full-length backdrop, like for taking pictures of dress mods and such, I can grab the binder clips and hang them from that fake mantelpiece I made as an Advent calendar back in December. The one I then decided not to take down after Christmas, because it’s kind of cute and it sure is a convenient place to display cards year round.
So there is my quick and simple crafting photography tip for you! Fast to put together, easy to set up and take down no matter how frequently you need to do so, not a bunch of hassle to remove or move, and only makes two small holes in the wall. Seriously, why didn’t I think of this ages ago??
(If you like the D20 pillow shown in this post, I’ll tell you that they’re pretty straightforward – though quite time-consuming – to make. It’s just a bunch of triangles put together in the right order (template for that here), and with numbers appliquéd on. I’ll also tell you that you can buy the second one I made, a lovely crimson one, from my Etsy store. If you do so before someone else does, of course.)

