While the pre-Christmas season is one of scouring Pinterest for gift ideas and mad dashes to the mall to do your shopping, the post-Christmas season is one of recovering from too many sweets, boxing up old unused items for the goodwill, and writing thank you cards.
As a kid, I was held to the rule that thank you cards must be sent to anyone who gave me a gift and was not able to see me open it in person (and thus receive a verbal thank you). Every family does things a little differently, but I try to adhere to this practice, even if my thank yous are sometimes a few months late now that my mother isn’t hovering over me two days after Christmas to make sure I get them done.
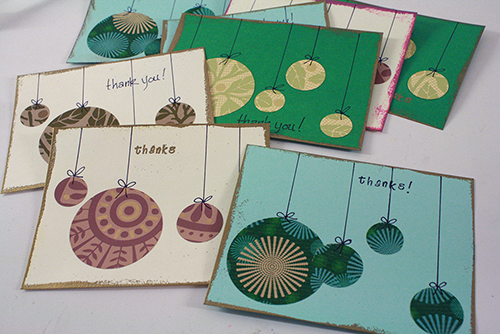
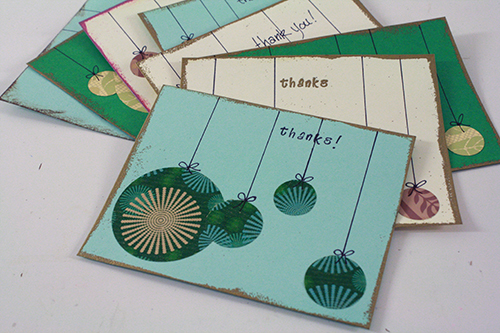
Being me, I add a special splash of insanity by wanting to send handmade thank you cards. The trick there is to find a card design that can be fairly quickly mass produced. Last year I messed with stamping and patterned paper shapes. This year I found a way to make simple but pretty ornament themed cards that also made use of leftover wrapping paper.
So whether you have a lot of leftover wrapping paper to use up, or just want to procrastinate actually writing your thank you cards by doing a craft project first, here’s how to put these together.
———————————————
What you’ll need
materials:
- blank cards OR plain card stock
- used wrapping paper (or other papers – leftover bits of scrapbooking paper, old greeting cards or gift tags, etc.)
- glue stick
- coloured, un-patterned card stock OR blank pre-cut cards
- black felt tip pen (a fine tipped sharpie works well)
- scrap paper
- [optional] embossing ink pad and powder
- [optional] small letter (as in “of the alphabet”) stamps and stamp pad
tools:
- circle cutter or circle punches in different sizes OR a pen, scissors and various small round shapes to trace (small lids, cookie cutters, thread spools and coins can all work well for this)
- [optional] heat gun or stove (if you want to add any embossed edges or details
- ruler
- glue stick
———————————————
Putting it all together
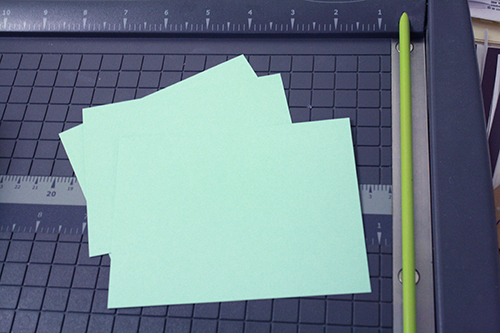
1) If you have blank pre-made cards to work with, go ahead to step two. Otherwise, cut your sheets of card stock into smaller pieces, the size you want your cards to be.
You can cut them twice as tall and fold them, to make, well, folding cards, or just cut rectangles for non-folding cards that will have a pretty picture on one side and your message on the back. That’s the option I went with this time, partially due to my card stock being in rather short supply.
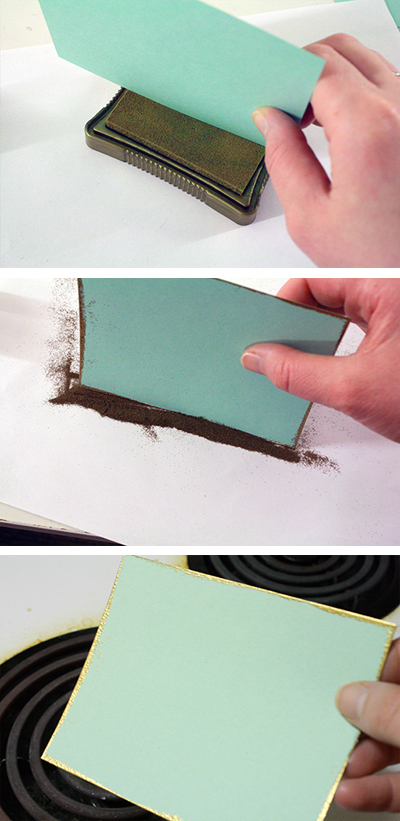
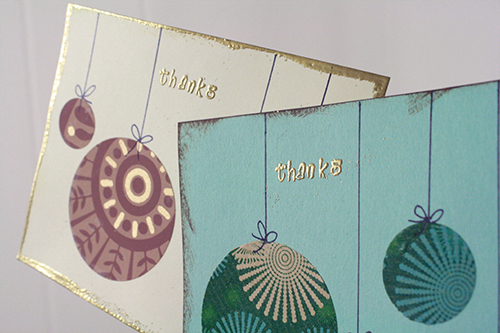
2) If you want to emboss the edges of your cards (I think it’s a pretty touch), simply drag each card edge along your embossing ink pad. Then dump a line of embossing powder onto some scrap paper, swipe the inked card edges through the powder, and hold over a hot stove burner or go over with a heat gun.
You can find more information about embossing in general in that other thank you card post – there’s a whole little section titled “embossing.” It’s really easy and not anywhere close to as complicated as I thought before I actually learned how to do it.
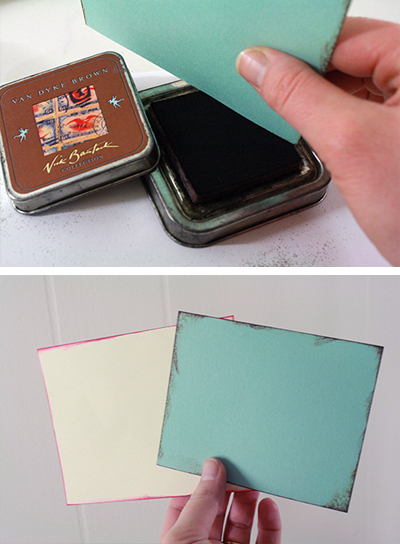
Or you could just swipe the card edges across a normal stamp pad – coloured or not – as shown below. (Unlike in the photo, I actually find this is easiest to accomplish when I hold the stamp pad in one hand, the card in the other, and actually move the stamp pad along the edges of the card, rather than the other way around. But as usual with my tutorials, one hand needed to be holding the camera, so the picture doesn’t show this.)
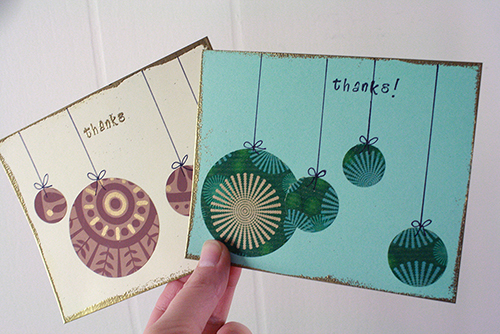
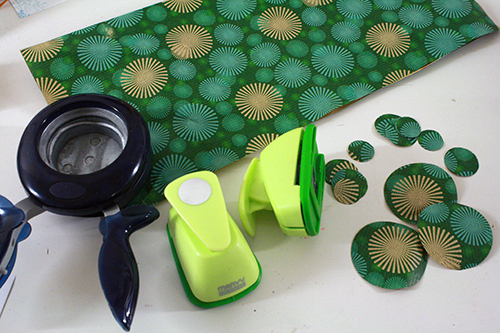
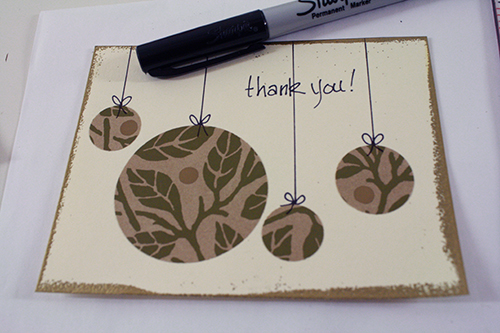
3) Cut several different sized circles out of your wrapping paper. I usually do one largish circle (a couple inches across) and 3-5 smaller ones per card, but it depends on the size of your cards and your own design preferences.
4) Lay the circles out on the card loosely, sorting out where you want them all to go. Once you know where they should each be, glue them down.
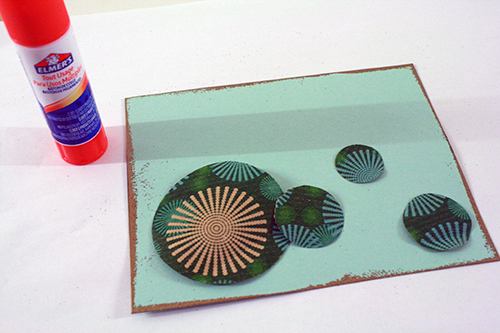
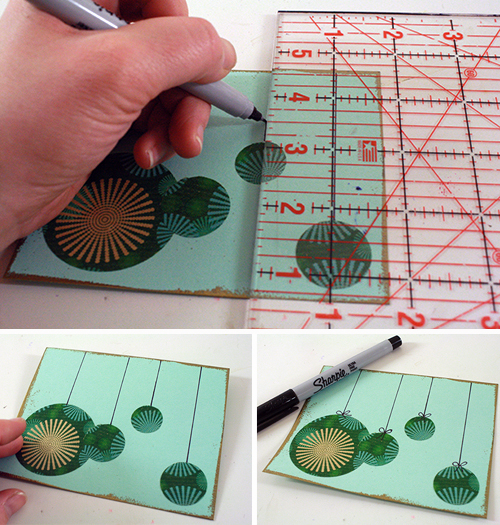
5) Use your ruler and felt tip pen to draw a straight line from the middle top of each circle to the top of the card.
If desired, draw a simple little bow (two small loops and two little dangling lines) at the top of each circle where the line meets it.
6) Stamp “Thank You” (or whatever message you like) somewhere on the front of the card.
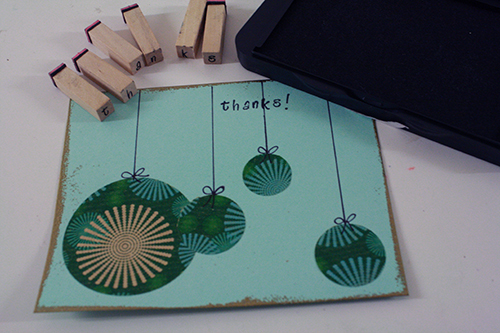
Or, if you have nice handwriting, just write it in the place of your choosing.
Or if you want to get really fancy, you could always stamp the letters with embossing ink, dump powder over them and emboss the “Thank You” message. Shiny.
7) And now it’s time to actually sit down and write those thank you messages on the cards, and get them mailed!
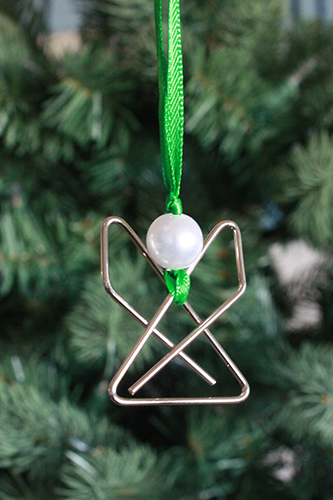
On an ornament and Christmas related sidenote, check out the paperclip angel ornaments my mother-in-law made us! She said she spotted the idea online somewhere, and I think it’s absolutely brilliant.