
This was one of those weeks where the project I’d intended to write a tutorial for just wasn’t working out. I mean, it was working generally, but slowly and with tweaks needed, and I decided that I’d rather come up with an entirely new idea at the 11th hour and begin its tutorial-making process from scratch rather than work with what I already had, which would require reworking a couple portions of it and doing one or two more trials. I wasn’t truly saving myself any time or effort with this switch, not that that’s a first for me. Causing myself extra craft-related work is, alas, probably what I’m best at in all the world. But hey, when you’re not feeling a project, sometimes you just need to walk away.
So I did. And then I simply needed to immediately come up with a new project idea. Easter themed, of course. It’s actually no easy matter to come up with a holiday craft that is your own when you’ve been looking at everyone else’s holiday craft ideas for the past 3 weeks, and also you’re telling yourself you need to figure this out in the next 15 minutes. I have upcoming posts that I planned and started months ago. But not this week’s.
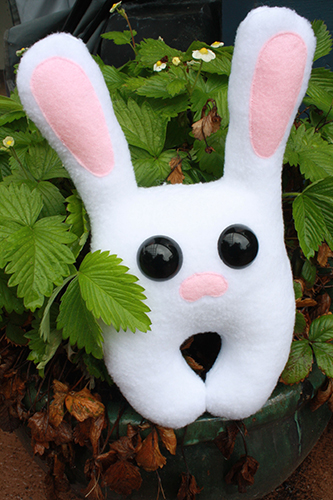
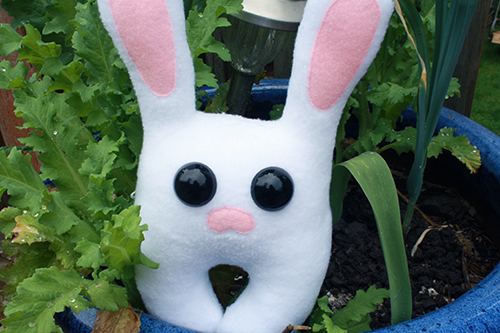
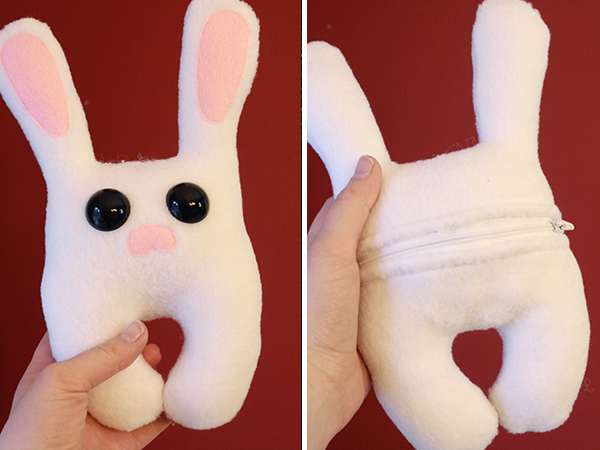
Eventually (meaning within 15 minutes) I came up with making this plushie. Despite making plushies constantly myself, I’ve only actually written tutorials for plushies twice, as far as I can recall, though I’ve really meant to do more. Also, it’s long been a dream of mine to figure out how to stick a zippered pocket in the backside of a plushie, because that could just be all kinds of useful down the road, and also it seems really damn impressive. (And guess what, it is really impressive, but it’s not actually that hard to do. Yay!)
———————————————
What you’ll need
materials:
- fleece in whatever bunny colour you like – you don’t need much, about the equivalent of 2 8.5 x 11 sheets of paper
- pink felt – just a tiny bit, like a few square inches
- black felt (again, just a wee piece) OR doll safety eyes
- cotton or other thin fabric, about 8-10 square inches – if you’re using white fleece for your bunny, use white or another very light coloured fabric here
- zipper – in the same (or similar) colour as your fleece
- pink thread
- thread the same colour as your fleece
- stuffing
- bunny plush pattern – number 22. under “Sewing patterns” on the Patterns page
- candy or whatever to actually put inside the bunny’s butt pouch
tools:
- fabric scissors
- paper scissors (for cutting out the pattern, b/c if you use your good fabric scissors for this, an army of righteous crafters will hunt you down and force you to repent)
- straight pins
- sewing machine
- hand sewing needle
- a chop stick
- iron and ironing board
———————————————–
Putting it all together
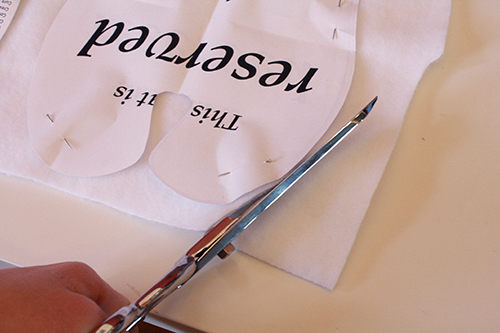
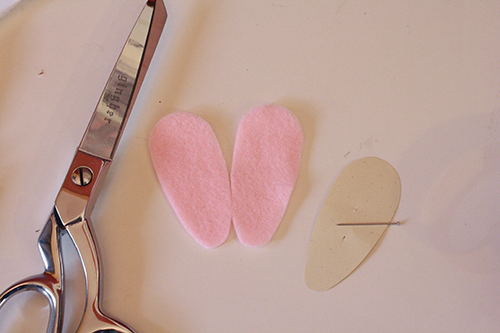
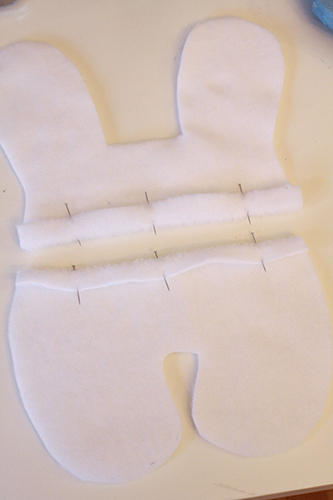
1) Begin by printing out the pattern (found on this page) and cutting out the pieces. Then pin the pieces to your fleece and cut them out.
Note that your cutting out will look a little different from mine, since to save space and keep the pattern to one piece of paper I drew it such that you need to pin each pattern piece to a folded piece of fleece, pinning the indicated part of the pattern along the fabric’s fold.
2) Now cut out a nose and two inner ear pieces from pink felt.
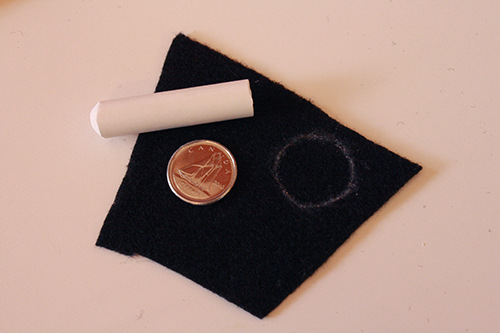
You can also cut out two eyes from black (or whatever colour) felt, or you can use doll safety eyes (which is what I did in the end). If you want to use felt, here’s a trick for cutting neat circles out of a dark colour. Grab a small coin (a penny or nickel) and trace around it with chalk. Then just cut along the chalk line.
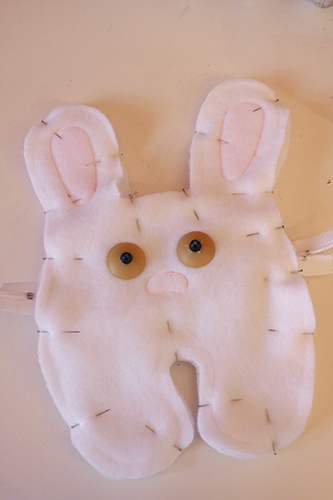
3) Pin the pink ear pieces and the nose in place on the front piece of the bunny (make sure you pin them with the front side of the fleece up, if the fleece has a front side and a back side). Pin the eyes in place too if you are doing felt eyes. If you’re using safety eyes, leave those off for now.
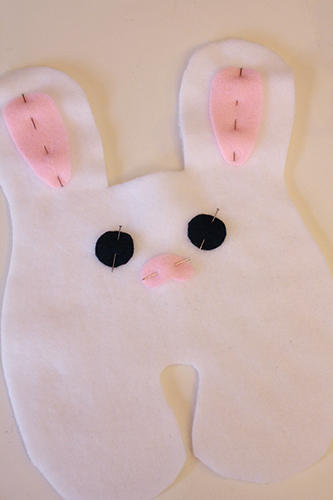
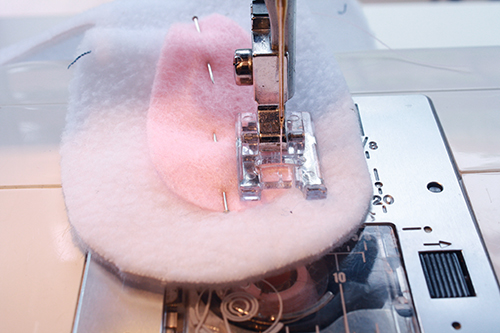
4) Using matching thread, sew a straight line just inside the edge of the ear and nose (and possibly eye) pieces, securing them in place. If sewing just inside the edge of the felt is a bit tricky for you, switch to a not-too-wide zig zag stitch instead, which will be easier to place along the edge of the felt and still have it look tidy without as much sewing practice and control.
If you are using safety eyes, you can now secure those in place, once the ear and nose pieces are sewn on.
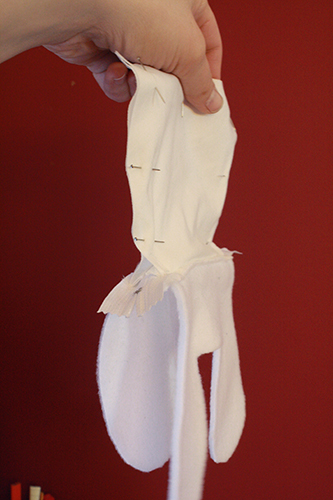
5) Put that front bunny piece aside for now, and grab the two back bunny pieces. Flip the pieces so their front side (if they have a right side) is facing down. Fold the flat, middle edge of each piece down about 1/4 inch and pin it in place.
Sew a straight stitch along this fold, securing it in place.
6) Now grab your zipper, and lay it down with its right side facing up. Take one of your back bunny halves, and pin the folded and sewn edge (right side facing up!) to one side of the zipper.
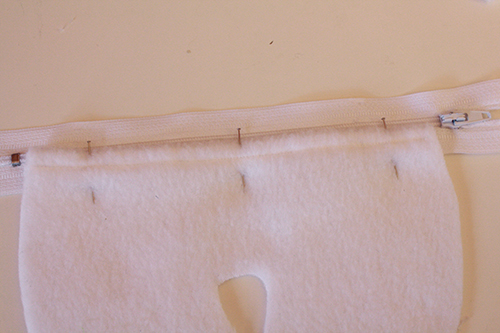
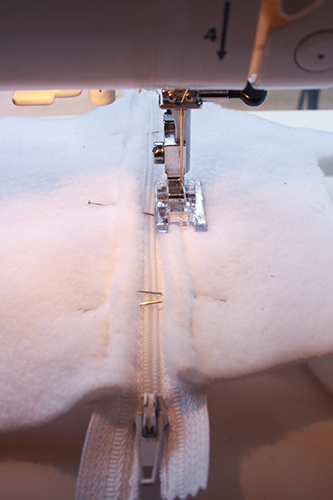
Sew a straight stitch on top of your previous line of stitching, securing the bunny piece to the zipper.

Repeat this with the other back piece of the bunny, sewing it to the other side of the zipper. Make sure the sides of the two bunny halves match up on either side of the zipper.
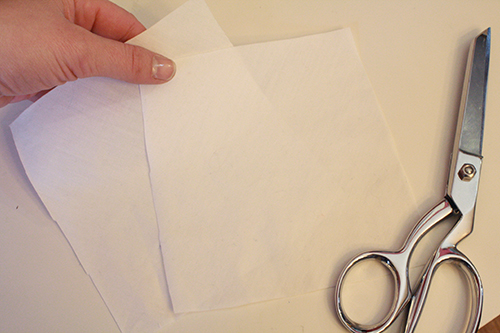
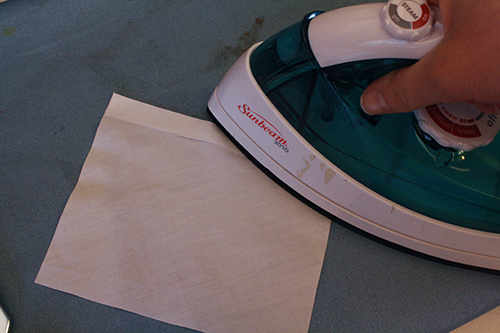
7) Turn on your iron (med. to high setting). Then cut two small pieces of your cotton or other thin fabric, about 4 inches square.
8) Fold one side of each square over about 1/4 inch and iron it flat.
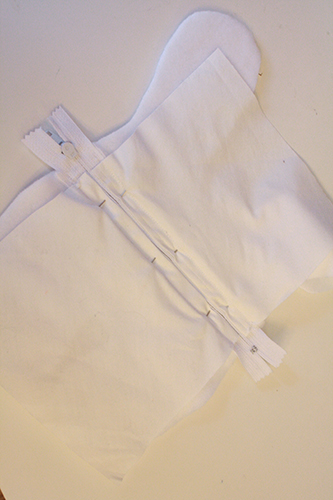
9) Take one of these squares, and place the ironed-down edge along the back side of one half of the zipper, and make sure it’s centered on the half bunny piece its laying on top of. Lay it so the raw ironed over edge is hidden. Put a pin or two in to hold it in place, then flip the whole piece over and pin it from the front, pinning along the edge of the zipper through the fleece, the zipper and the cotton.
So it should look like this from the back
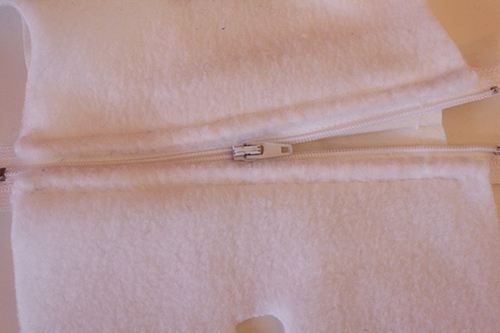
and like this from the front.

10) Once again, flip the whole thing so it’s facing upward (so you’re looking at the front side of the zipper, with the fleece pieces sewn on top of it along either side), and sew again along that original line of stitches on either side of the zipper. This is now sewing those back layers of cotton squares in place.
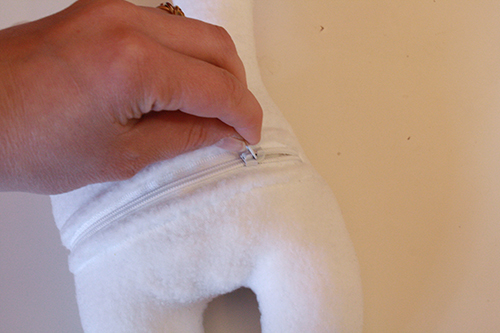
11) Believe it or not, the zippered pocket part is almost done now.
VERY IMPORTANT: with the bunny pieces right side up, open up the zipper halfway so the zipper pull is in the middle of the fabric pieces. If you don’t do this before completing the rest of the steps below, you will not be able to open and close your zippered pocket – you’ll essentially end up having sewn it shut. So open that zipper up halfway before you continue.
Flip the piece over again to the back side, and grab the two squares of cotton, which are now sewn down along one edge. Match them up along their other three edges and pin them together.
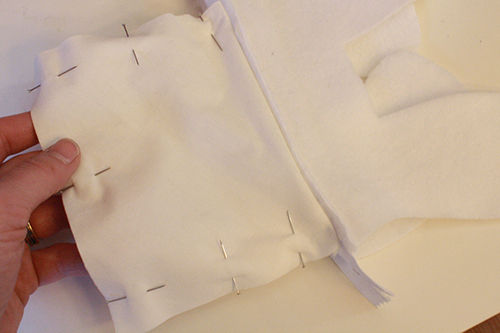
So you now have two pinned-together squares of cotton, with two bunny halves and a zipper hanging down from their fourth edge:
12) You probably saw this next step coming. Sew around the pinned edges of the cotton square, securing them together. Sew as close to the zippered edge as you possibly can, without actually sewing into the zipper. Now you have a sewn, close-off and secure pocket area.

Fold the cotton pocket up into the middle of the zippered area and pin it down, just to keep it out of the way.

13) From here on out, it’s pretty much standard, basic plushie-making stuff. Pin the right sides of the bunny’s front half and zippered back half together.
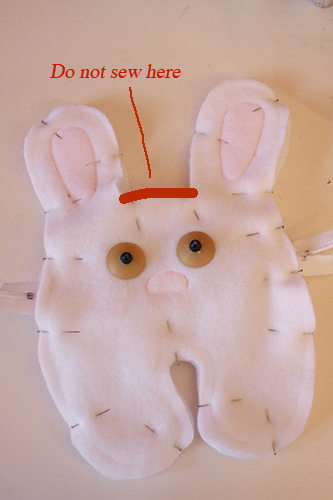
14) Start at the inside bottom of one ear and sew all around the edges of the bunny (back stitch a couple times over the ends of the zipper when you go across them to really secure them), leaving the space between the ears open and unsewn.
Once you’ve sewn all around the bunny (except between the ears), snip off any remaining stick-out bits of zipper on the sides.
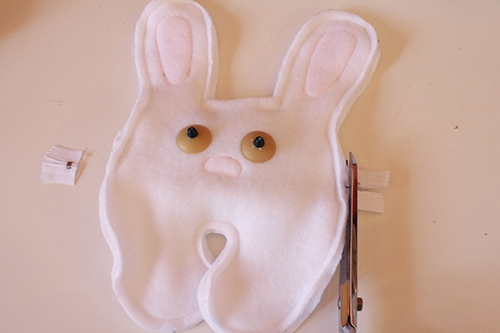
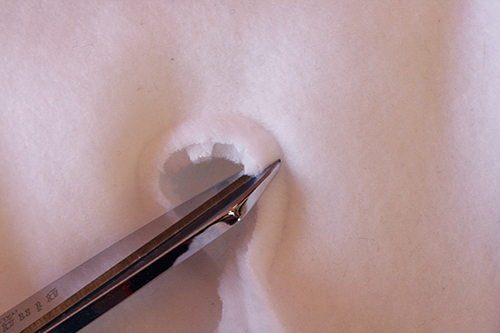
15) Use the very tip of your scissors to cut little slits up to but not through the line of stitching between the bunnies legs and in other tightly curved areas, such as around the tips of his ears and bottoms of his feet.
16) Use the opening between the ears to turn the whole thing right side out. Use the tip of a chopstick to poke out and smooth the ends of ears and feet and such.
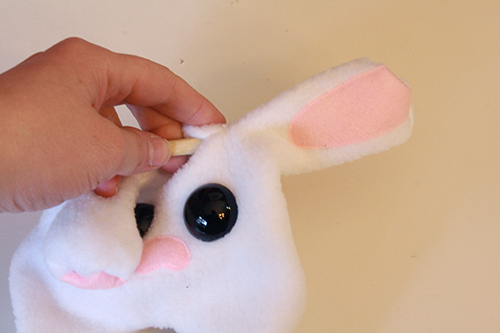
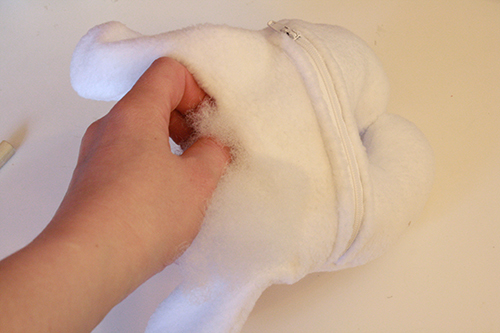
17) Zip the pocket on the back of the bunny closed, then stuff the bunny via the hole between its ears. The idea here is to stuff the legs and area behind the eyes full. For the area in front of the pocket, stuff it so it looks nice and plump from the front, but don’t cram as much stuffing as you can in there or you’ll have no room for the pocket to hold anything. You’re looking for a nice middle ground – stuffed, but not as fully stuffed as you’d normally do for a plush.
And as for the ears, stuff them just lightly, so they stand up and don’t flop, but aren’t all plump and cylindrical.
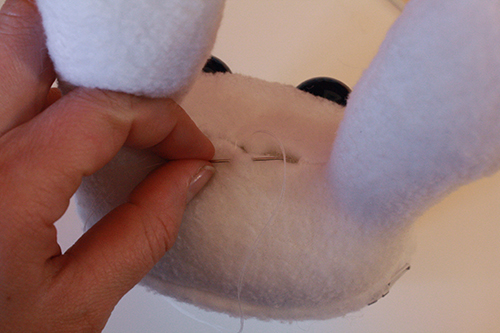
18) Once it’s stuffed, thread your needle, fold the raw edges of the bunny’s opening down inside that opening and stitch the hole shut.
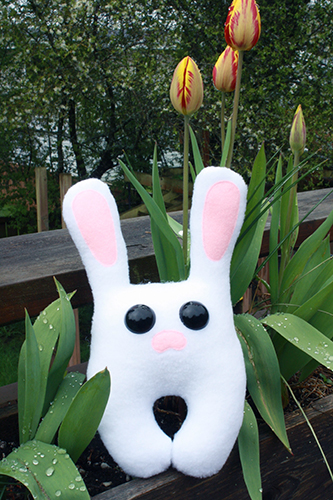
Optional: hand sew a little white pom pom to it’s backside just below the zipper for a tail! Just be sure you only stitch through the other fleece layer, and not into the pocket beneath. I didn’t have a white pom pom on hand, which is why I didn’t do this myself, but I think it would be super cute.
19) Now fill the bunny’s pocket with little treats or notes or whatever, and gift it! Or keep it. You did just work pretty hard to make it, after all.
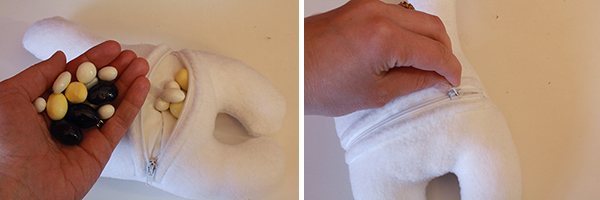
(It is frankly easier to stuff a little packet of candies in the pocket, but all I had handy for the photoshoot were loose ones.)
Apart from Easter, this could make a really cute tooth fairy pouch for a little kid to put their tooth in at night, or just a special plush for them to hide little treasures in. The principle transfers easily to any other plush you might want to make, too.