I have so many little bits and pieces type crafts on the go right now in preparation for Easter, and I thought I’d share them with you while you’re waiting for the main, meat and potatoes tutorial of today. That’s right, this is just gravy, folks! Extra content because I love you.
So below are some of the Easter crafts I’ve been working on, crafts from past years that you might want to check out, and a couple of projects I spotted online and loved at first sight.
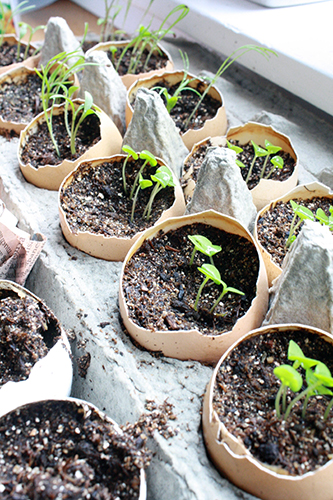
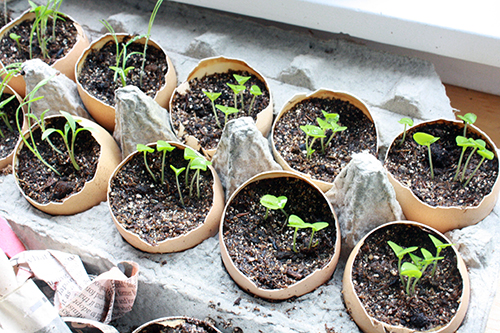
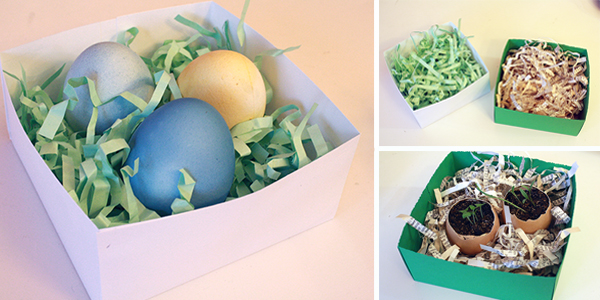
Easter egg planters
First of all, a lovely idea I’ve seen many places online is planting half eggshells with herb or flower seeds. Just wash the shells out, fill them with dirt and plant a few seeds in there. Give them a good spritz of water from a spray bottle, set them indoors in a warm sunny spot, and wait a few days, spraying them with water once a day, unless they still look pretty wet. I know it’s a bit last minute for this now, though if you did this immediately, you might have sprouts appearing by Easter Sunday.
I planted basil and wildflower seeds in mine (in different eggshells, of course).
Then gift these little planters instead of sugary chocolate eggs. They’re super cute, and you’ll feel like a big damn hero for managing to make something green grow, possibly (depending on where you live) while there’s still snow on the ground outside.
When the sprouts get a little bigger, they can just be planted shell and all (crack the bottom of the shell a bit first, carefully) into a larger pot of dirt to keep growing.
emptying and dying
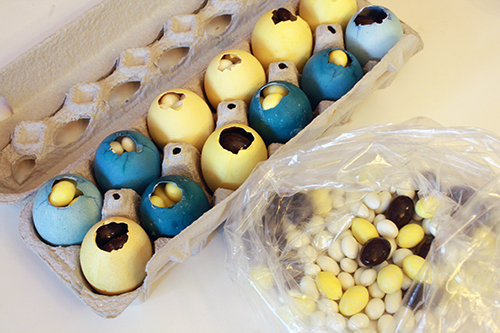
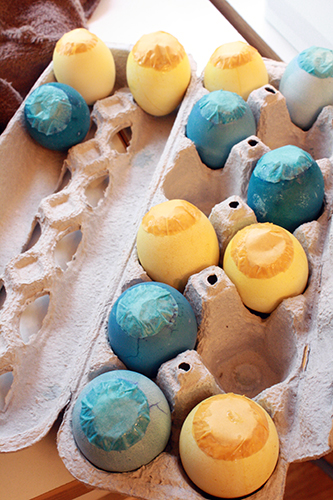
For a twist on the customary egg dying, you can create beautifully coloured eggs with natural dyes. I used the instructions here to dye eggs bright blues and yellows using turmeric and red cabbage.
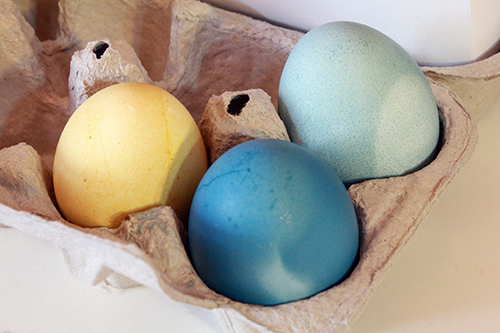
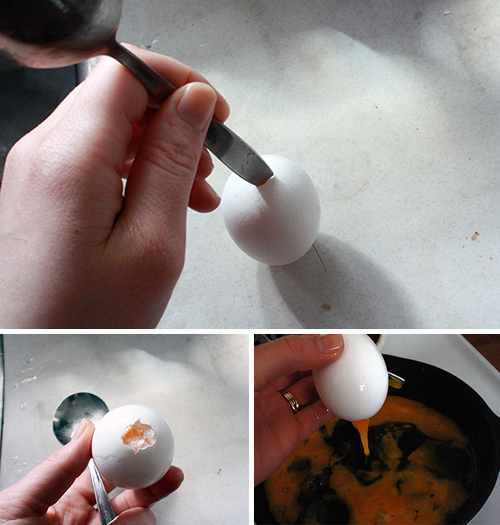
I get tired of hard boiled eggs pretty fast, so I like to empty out my eggs before colouring and stick little candies in and reseal them afterwards. And I save the insides for scrambled eggs or quiche.
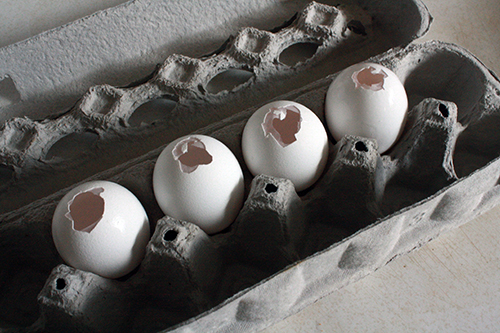
To do this, get a spoon or fork with a small top end, and use that end to gently crack the bottom of the egg, making a little hole. Then stick the utensil’s end up inside and use it to scoop and pull out the egg through the hole, breaking the yolk and coaxing the white out. Pour it into a frying pan and make some scrambled eggs right away, or put it in a sealable container in the fridge till your ready to use it.
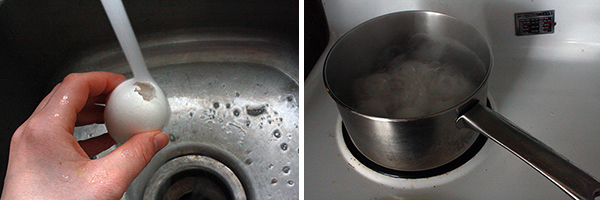
Rinse the eggshells out, then boil them in a pot for a few minutes to make sure they’re totally clean, and let them dry out. Then colour them and let them dry again (don’t leave them in direct sunlight for a bunch of time or they’ll fade, learned that the hard way).
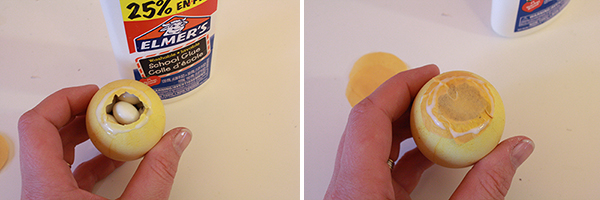
To fill them, find small treats that will fit inside the holes. Little gummies, M&Ms, jelly beans, etc. I went for chocolate covered almonds, yogurt covered raisins, that sort of thing.
Gently insert as many as will fit into an egg, then cut a circle of printer weight paper or 2-3 circles of tissue paper the same general colour as the egg, and a bit bigger than the hole. Put a line of white glue around the opening, lay the paper circle down over the glue, and press and hold it till the paper stays in place (it’s easiest with tissue paper). With tissue paper, put another circle of glue & another circle of paper down overtop of the first. You might want a 3rd layer, though 2 will likely do. Let it all dry and then gift them!

boxes and paper grass
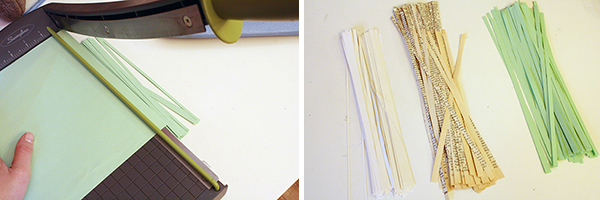
For gifting the eggs, I made little paper boxes (just like here, but only make the bottom half of the box) and filled them with homemade fake grass. Much nicer than the storebought stuff. You remember that stuff? Horrid plastic grass nest stuff we had in Easter baskets as kids? I assume it’s still around. Not that we thought there was anything awful about it as children, but it’s got to be environmentally terrible and heaven knows what plastic-y chemicals it’s laced with. Even if you don’t mind the stuff, it is really really easy to make your own, for free, with what you’ve got in the house already. And when you’re done with it you can just toss it in the paper recycling bin or even the compost. You just need to have some style of quick and easy to use paper slicer.
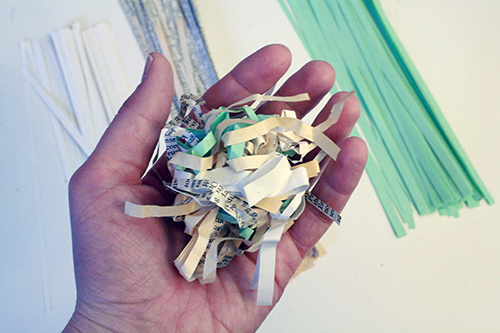
Basically, grab 2-3 pieces of paper – newspaper weight to printer weight. Coloured, plain, whatever. You can even use old book pages for this – pages from things like old dictionaries and encyclopedias are fantastic for this. (Yes, I am a monster for cutting up books. I established this ages ago, and in fact the book pages shown here are from that very same era of book purse making.) Use your paper slicer to cut lots and lots of wee thin strips of the paper. Then grab a bunch of strips and just crumple them up and mess them about in your hands. That’s about all there is to it.


other projects
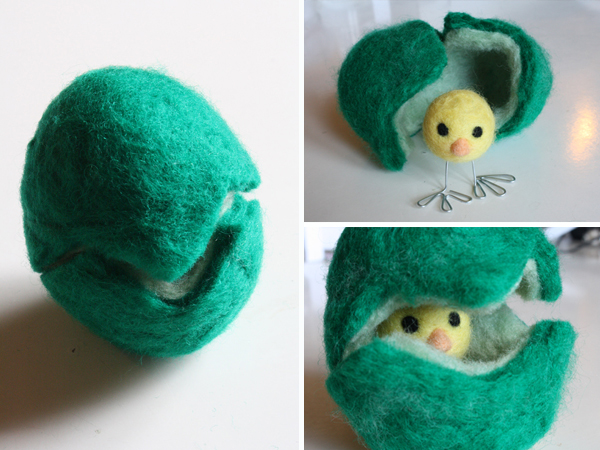
I’ve done many other Easter posts in past years, so I thought I’d revisit a couple of favourites. First, you can check out this tutorial on how to wet felt an Easter egg for an especially soft and fibrous Easter gift.
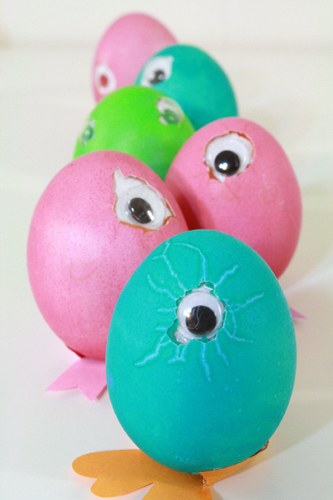
My very favourite past Easter project of all is this one, for dyed eggs that appear to be hatching, with who knows what inside!
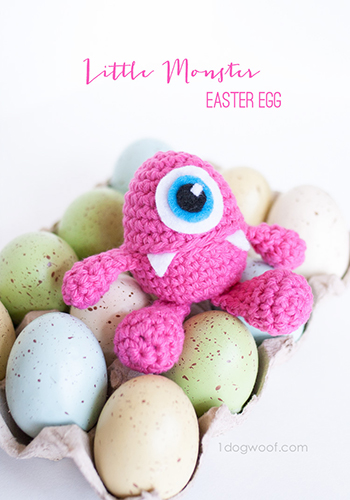
While perusing other online craft sites, I discovered this absolutely adorable tutorial on One Dog Woof for a crocheted Easter egg monster. Since I don’t crochet myself, I’d love to work out a wee sewn version of this sometime.
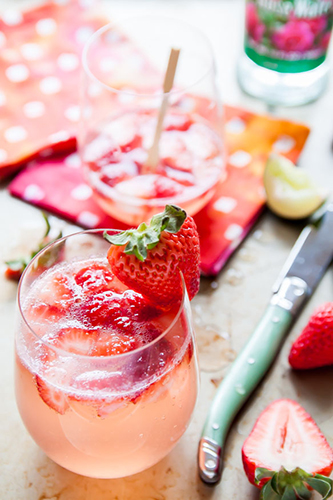
And while it’s not strictly Easter themed, this strawberry rose gin fizz from dessertfortwo looks like a perfect spring cocktail, and would fit in very well with many an Easter holiday.