I’m not a big fan of wedding favours, to be honest. On all these bridal sites they list ideas like commemorative keychains and magnets with the happy couple’s names and image emblazoned upon them like some bizarre “I was there” wedding tourist trophy.
Plus getting all that stuff manufactured somewhere is going to be some kind of expensive and it’s also just more plastic in the world, yay. They’re like special occasion UPOs – Useless Plastic Objects – as my dad called McDonald’s toys and all the other cheap plastic detritus that tends to clutter the life of anyone with kids. I did not want UPOs to be part of my wedding.
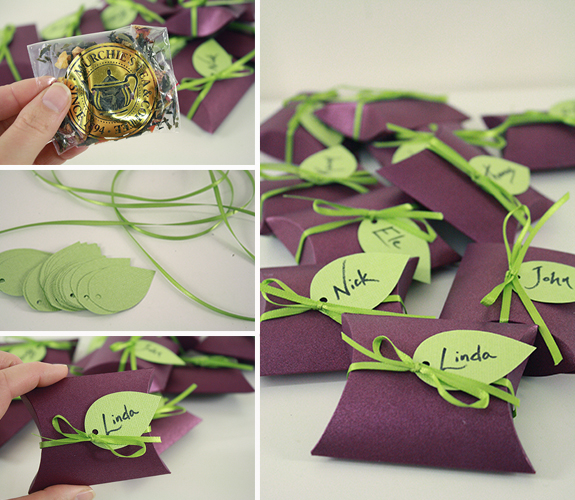
I’ve become a big fan lately of gifts that are consumable. We, our families and our friends just don’t need a lot more stuff. But a special treat that you can enjoy and then not have to keep somewhere – that seems good. I went to a friend’s wedding a couple years ago that had little favour boxes of trail mix. Love it. Being on a budget and being the crafty type and being in favour (haha) of consumable items, we decided to fill little paper boxes with a couple servings of some good tea from a local shop.
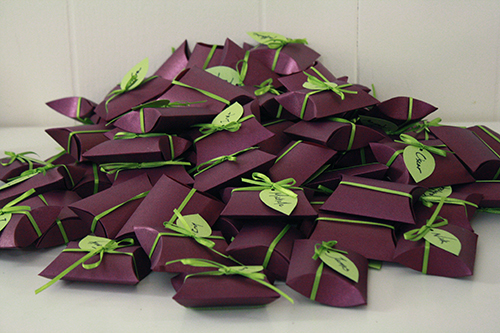
Which is why I cut, folded and glued over 75 paper pillow boxes. They’re pretty simple to make (I wrote a tutorial for them a while ago, which includes the template), but it did take some time. I carried this project with me to family dinners, friendly gatherings, even a LoadingReadyRun Friday Nights shoot, and worked on them in whatever spare moments I had between bigger projects.
Also, there are two helpful shortcuts I used, which aren’t included in the original tutorial so I’ll show you those now.
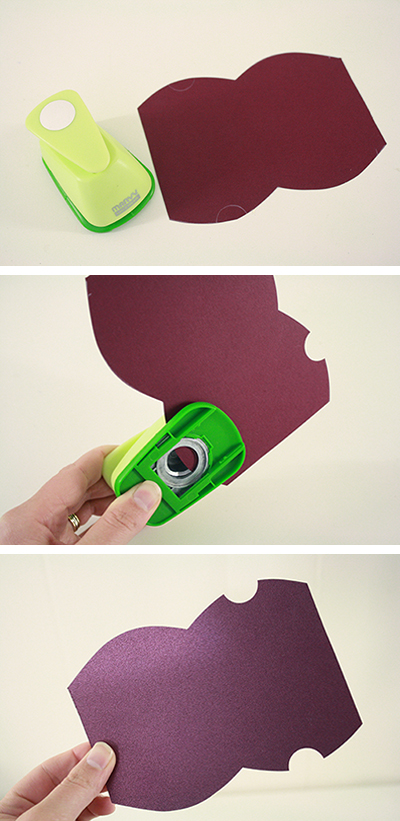
First, instead of cutting out the two little half-circle divots in each box that helps you open the box once it’s fully constructed, cut out the rest of the box and then use a small circle punch to create nice, neat divots much more quickly:
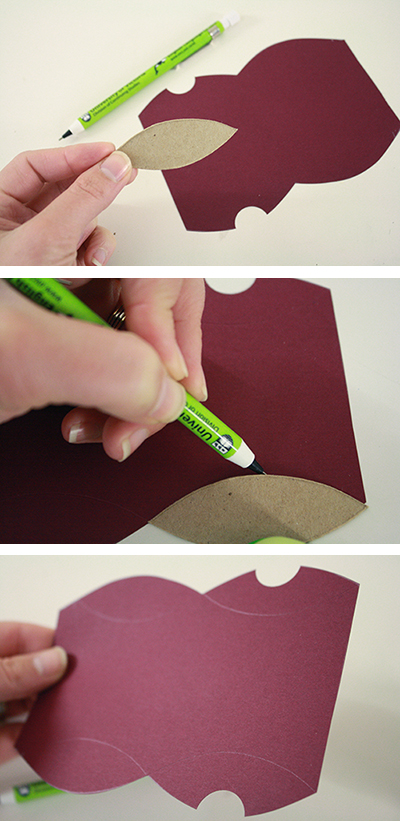
Second, make yourself a little cardboard teardrop-oval shape (what do you call that shape anyway – I feel deficient for not knowing this*) the shape and use that to help you trace the curved lines at each end of the box, instead of slowly and carefully freehanding along those lines with your mechanical pencil.
This also means you don’t have to print the template directly onto your nice paper.
*Thanks to @Proprietous on Twitter, I now have an answer! It’s called a vesica piscis, or fish bladder.
Oh wait, I did include that second tip in the original tutorial. Well, now you’ve been reminded. These things help a lot if you want to make pillow boxes in bulk.
And then there was just the small matter of gluing the boxes together, folding them into shape, measuring tea into little baggies, putting the baggies in the pillow boxes, cutting out 75+ leaf shapes, writing names on them, punching holes in them, cutting and tying ribbon around each pillow box, tying on the leaf and making a bow. No big deal. Look, I’m crazy, but in a way we already knew about. This isn’t “OMG MY WEDDING” crazy, this is just my usual “OMG CRAFT PROJECTS” crazy. Nothing new.
The favour boxes double as place cards at the tables, which is handy. We’re going to have two babies and one toddler at our wedding, and when all the grownup favour boxes were done I realized it might be nice to do something different for them, since tea probably won’t be quite their thing.
And of course I wanted these things to “match” the adult ones. Because a colour scheme is a colour scheme, and the fun of picking a colour scheme in the first place is using it for everything. Also I seem to suddenly have a bunch of fabric and ribbon scraps in this particular colour scheme – weird huh?
For the babies, I made little round balls with ribbons sticking out (something for them to hold on to, plus additional tactile sensations), a rattle (also known as a ping pong ball filled with wooden beads then sealed shut) inside and their name machine-stitched on a leaf shape sticking out the top of the ball. The leaves are made from scraps of the plum silk that our bridesmaids’ obis and our groomsmens’ (and the groom’s) ties are made of.
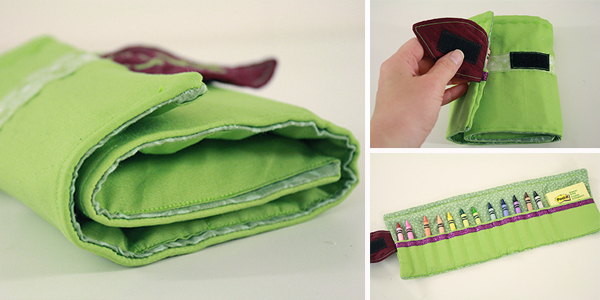
For the toddler, I made a little crayon “bandolier,” with spaces for 12 crayons and a pad of sticky notes. Also with her name on a purple leaf shape.
She won’t be the only one who gets to play with crayons at the wedding though. Oh no. Because along with the centrepieces and the favour boxes, something else, something awesome, will be adorning the tables…
EDIT: You can now see find out all about that awesome something else in this post!


